You’ve just had your logo designed and you love it. Now you want to show off your brand on everything you share online! You also want to protect your brand and your creations, in many cases. One way of doing that is with an image watermark.
Oftentimes when I am designing logos, I get asked by clients how they can use the logo as a watermark. There are several ways of doing this, but I am going to share one of my favorites. You will need Photoshop for this method and a black and white or grayscale version of your logo. I will use my photography business, Twin Satori Photography, as an example. FYI, I have Photoshop CS3 and a Mac. The process may be slightly different with different operating systems and photoshop versions.
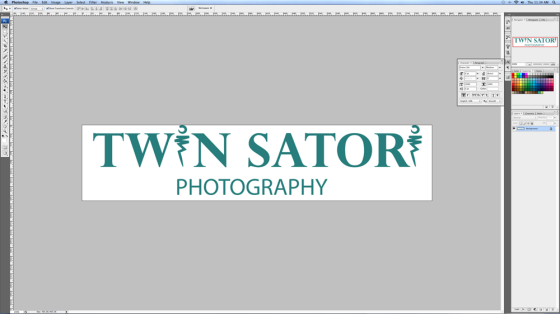
Step 1: Open your logo in a .jpg or .png format. Save it as a new file, such as watermark.jpg.
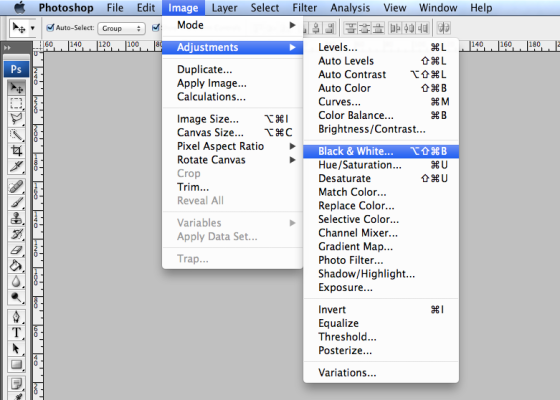
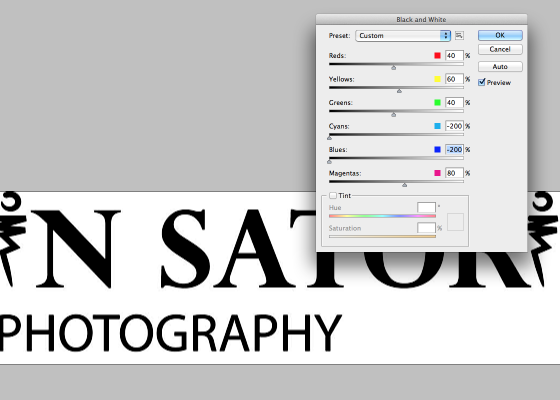
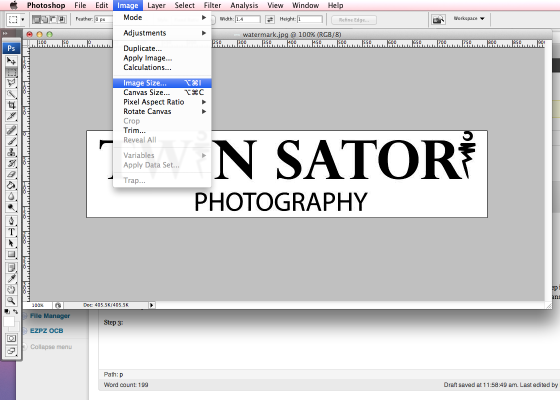
Step 2: Covert your logo to black and white. Go to “image” > “Adjustments” > “Black and White.” Adjust the sliders until your watermark is the correct tint. Keep in mind, when you use the brush to stamp your watermark later, anything black will show up as the color of your brush. Anything pure white will not show up. Grays will show up with a bit of transparency to them depending on how dark they are.
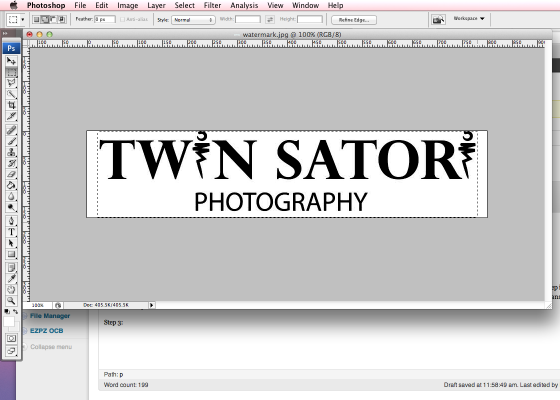
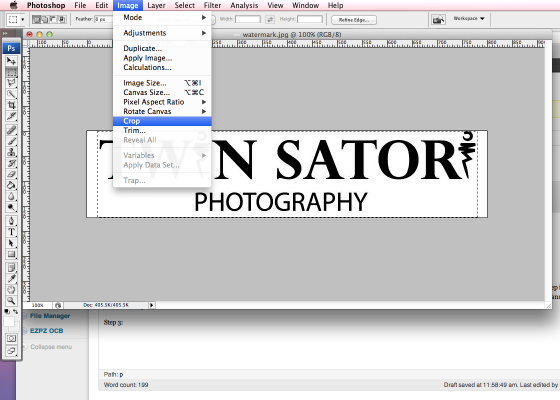
Step 3: Crop your logo to eliminate unnecessary white space. Select the Rectangular Marquee Tool (M) and select only the areas of your logo that you want to keep. Go to “Image” > “Crop.”
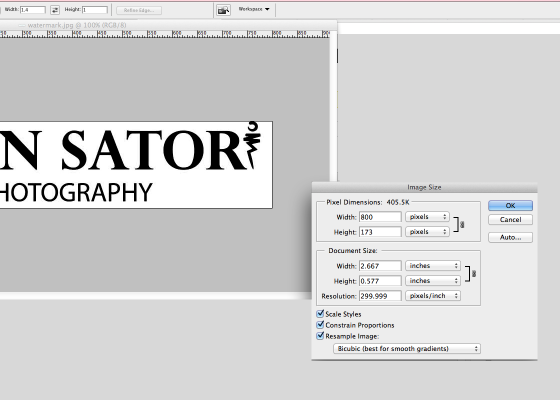
Step 4: Resize the logo to the number of pixels you want your brush to be. In this case, I made the watermark 800 pixels wide and I can scale the brush later.
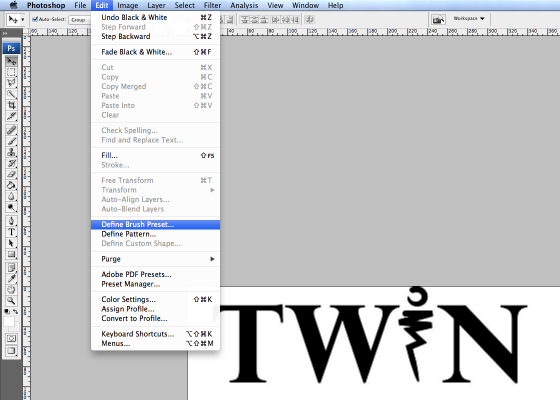
Step 5: Save the logo as a brush preset by selecting “Edit” > “Define Brush Preset” and save your name. In this case, I named the logo watermark.jpg.
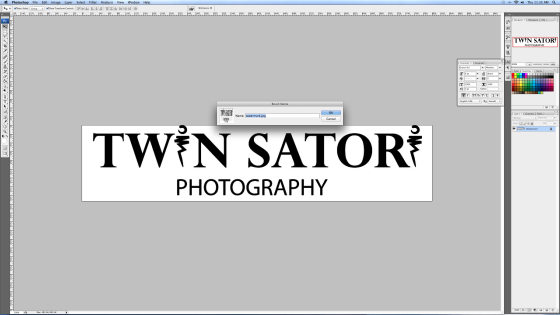
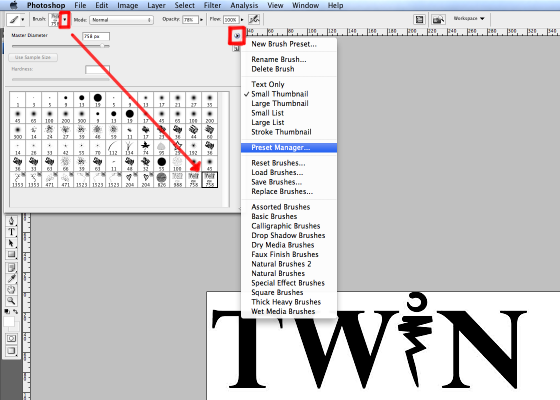
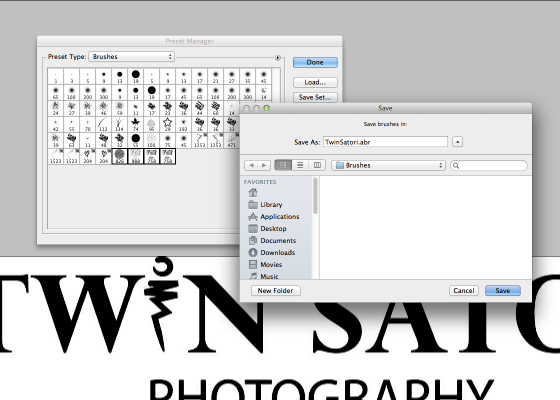
Step 6: You can now use it as a brush, but you will want take a few more steps to ensure that your watermark is saved long-term. Next, click on the Brush Tool (B) in the left side tool palette. Now, you will see a small logo and down-arrow at the top tool bar to the right of the words brush. Click on the down arrow and and all of your brushes appear. Choose “Preset Manager.” Select the brush you want to save (If you have more than one brush you want to group together use the “shift” key plus a mouse click to select multiple brushes). Once they are selected, click “Save Set” and name your brush set.
Step 7: Click “Done” in the “Preset Manager.”
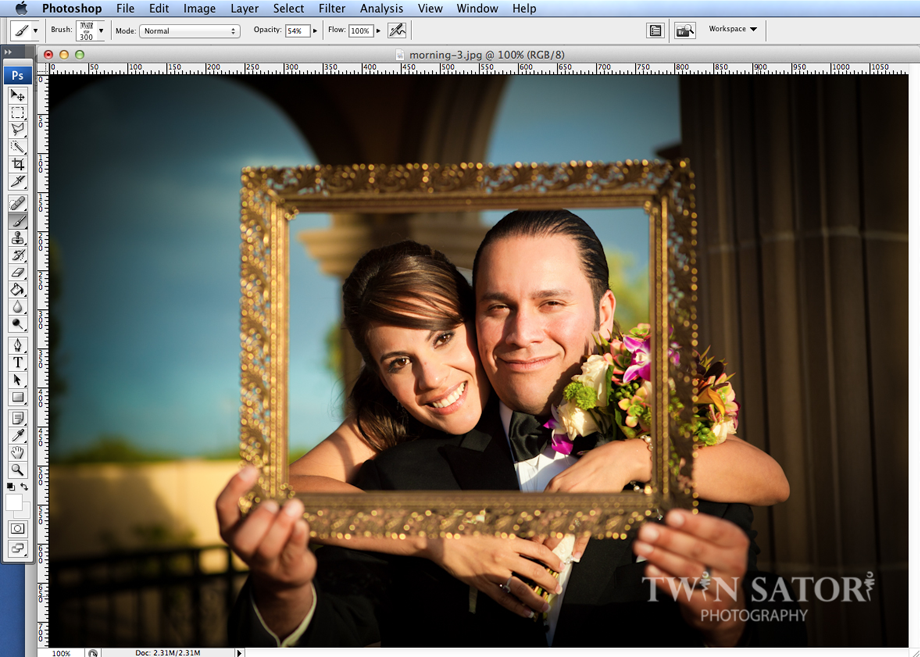
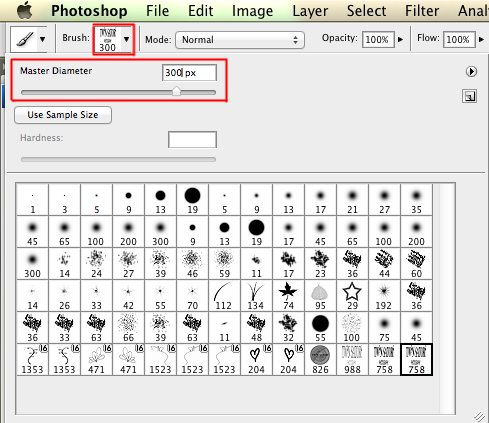
Step 8: Now you can use your new brush on your image! Select the Paint Brush (B) tool. Choose your new brush. Resize your brush to fit the image how you would like by clicking the down-arrow next to your brush logo again and using the scaling slider to change the size. I resized my brush to 300 pixels for an 1100 pixel wide image.
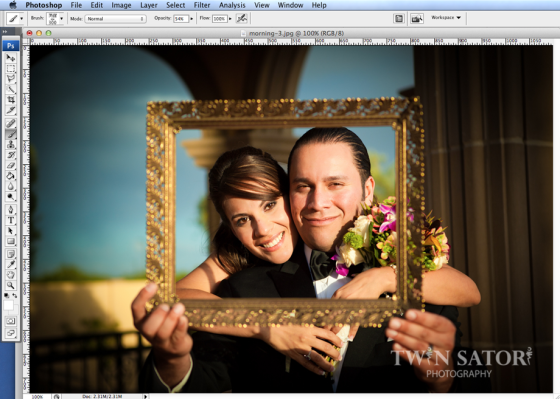
Step 9: Change the opacity of the brush with the slider on the top toolbar. I like to use somewhere around 60%.
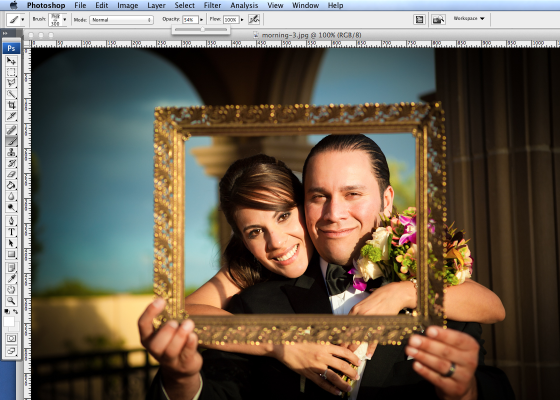
Step 10: Now all you have to do is stamp the brush where you want it on the image and re-save your image! Voila!
If you have any further questions, feel free to ask in the comments.



NICEEE.E.E.E.E.E..